Symcloud Platform is one of the most popular offerings in the Kubernetes world for managing stateful applications. It was formerly known as Robin CNP (Robin Cloud Native Platform). It is an enhanced Kubernetes platform that streamlines the deployment, scaling, and lifecycle management of data and network-intensive applications. It is fully compatible with the open-source Kubernetes API, so we can use the same tools and workflows that we use on-premises or on public clouds.
In this blog/guide, the below topics will be covered:
Supported environments by Symcloud Platform
Installation Methods
Installation Prerequisites
Prechecks
Symcloud Platform Setup
Key components of Symcloud Platform Dashboard
Supported Environments by Symcloud Platform
Symcloud Platform provides the flexibility to set up and deploy it on any of the environments like on-premise, bare metal, and virtualized environments as well as on any of the popular Cloud platforms like Google, Amazon, IBM Cloud, or Microsoft Azure.
Installation Methods
When discussing installation procedures, the Symcloud platform offers two distinct methods for installation:
a) Manual
b) Automatic (using Go Robin utility)
The choice between a manual approach, delving into the details from the ground up, or opting for the Go Robin utility provided by Symcloud for an automated installation depends entirely on our preference.
Both approaches will provide us with two different ways to setup our Symcloud Platform:
a) HA
b) Non-HA
When considering conducting a POC or testing the creation of Dev environments or Test environments, opting for the Non-HA approach is often chosen for its cost-effectiveness. However, when it comes to Production or DR environments, taking any chance of downtime is not acceptable. In such cases, Symcloud always recommends implementing HA mode to prevent any downtime.
In this blog/guide, we are going to use a Manual approach to set up a Non-HA based Symcloud platform in AWS from scratch.
Installation Prerequisites
When thinking of creating a resilient and robust platform, it should always be built from the ground up. Therefore, we must be careful in ensuring that the required prerequisites are in place.
As we are going with Non-HA mode here, we are going to setup a two-node Symcloud Platform cluster. One of the nodes (server) is going to be our Master node and other one will be Worker node (server).
Here are the prerequisites for setting up the Symcloud Platform:
Note: For more detailed prerequisites, kindly refer to docs.robin.io .
Prechecks
Before initiating the installation process, it is essential to conduct a pre-check to verify the presence of all required prerequisites, regardless of the cluster size—whether it’s a single node or multiple nodes.
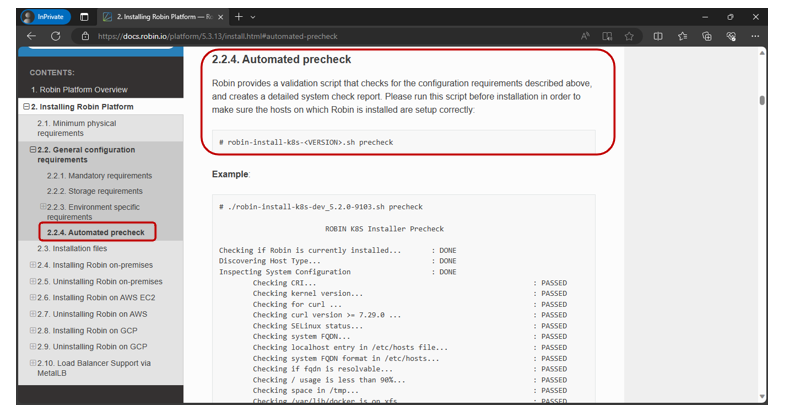
The Symcloud platform provides a utility that helps us to check whether all the prerequisites are met on these servers or not.
We can run this precheck utility as below,
# robin-install-k8s-<VERSION>.sh precheck
Note: We can get the installer file (utility) from get.robin.io or by contacting the Robin Support team.
Symcloud Platform Setup
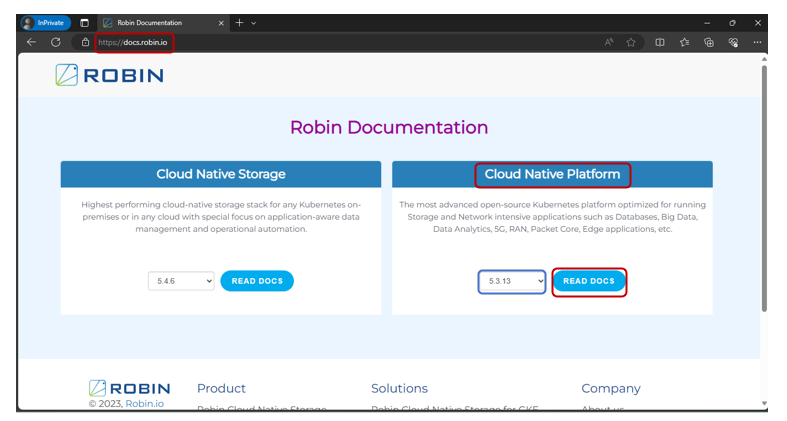
Before we get started, let’s explore the official documentation.
Go to docs.robin.io, select the version of our choice, and click on Read Docs under Cloud Native Platform section.
The latest version of Symcloud Platform at the time of writing this blog, is 5.4.x. However, we are going to install 5.3.x in this blog.
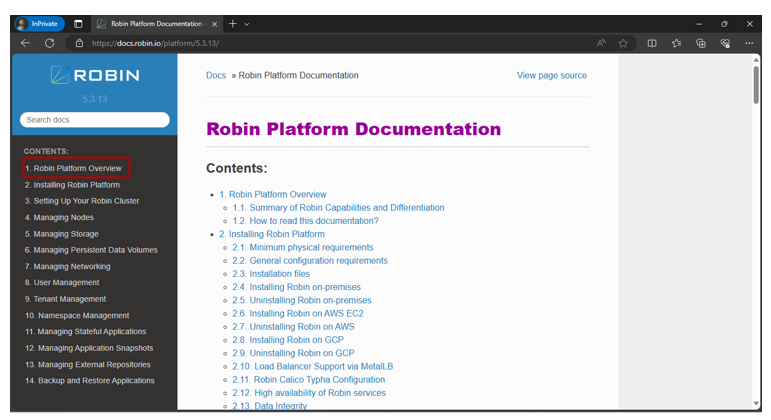
Let’s now explore the documentation for it.
Now click on Robin Platform Overview which will provide a high-level understanding of one of the most popular offerings in the Kubernetes world for managing stateful applications.
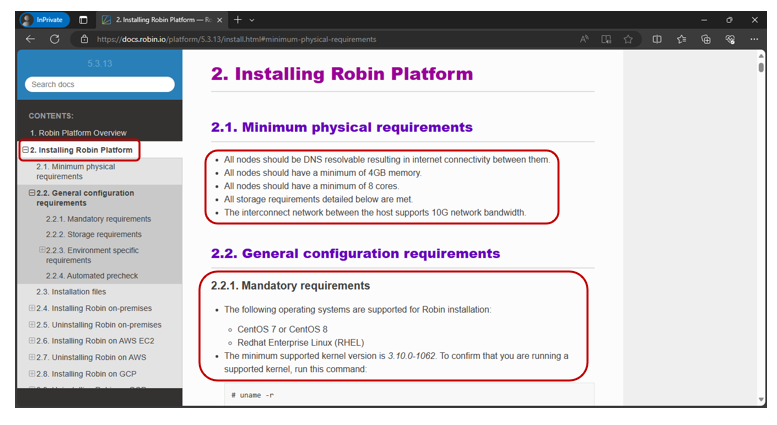
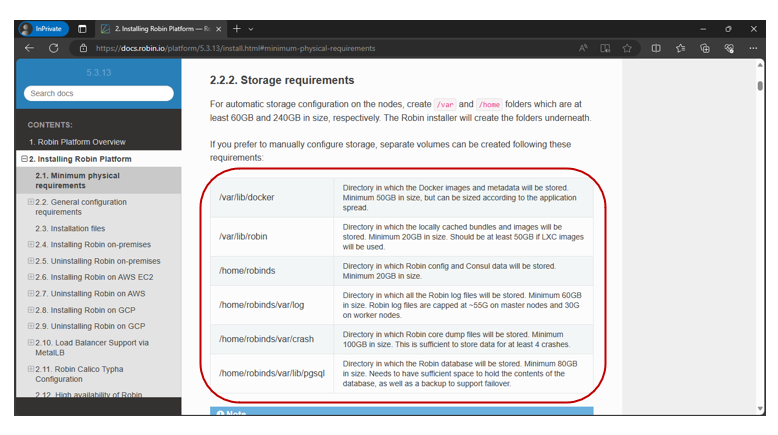
To check the prerequisites, click on Installing Robin Platform. Under this option, we will find all the prerequisites which we have mentioned in the previous sections.
We will also find the details about Automated Precheck which we discussed in the previous section.
Now that we are familiar with the prerequisites, let us proceed with the setup.
Note: We must contact the Robin Support Team to get the Symcloud Platform Binaries.
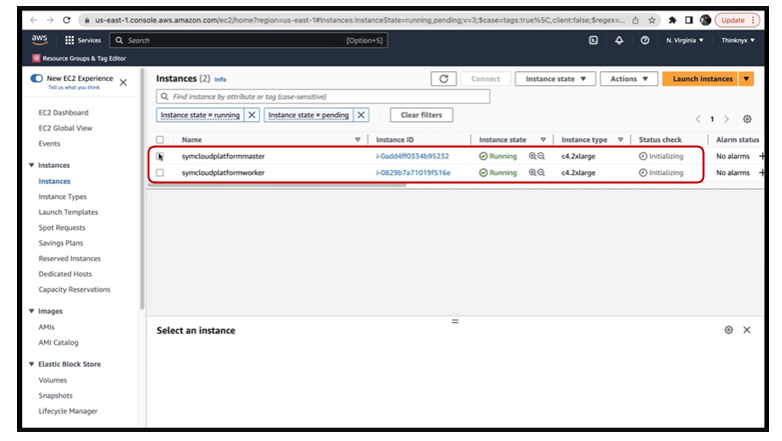
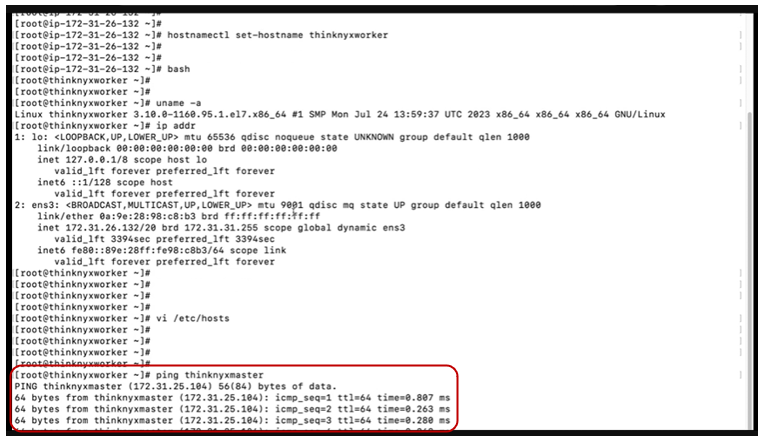
We have created two servers; one is for the master and another one is for the worker. For clear identification, let’s rename it to symcloudplatformmaster and symcloudplatformworker. As we can see, these servers are now in a running state.
Let’s login via ssh to the server and verify the prerequisites.
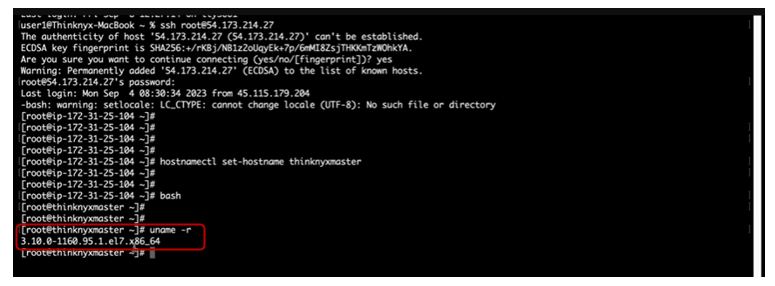
To check the kernel version, run the below command.
# uname -r
In the master, we can see that the kernel version is greater than the supported one as mentioned in the documentation.
The same command we need to run in the worker and verify the kernel version.
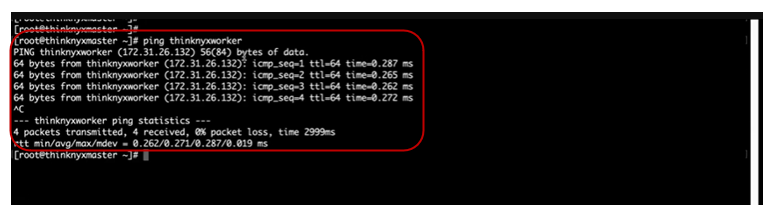
As we do not have the DNS server for this demo, we have done a local host entry in both servers for hostname resolution.
Note: In the production environment, we do not have to do the hostname entry as we will always have the DNS servers for name resolution. So, we just need to configure our/etc/resolv.conf file.
Now, we need to disable the firewall. There is no firewall by default on these servers. However, if there is a firewall, we need to run the below commands to stop and disable the same.
# systemctl stop firewalld
# systemctl disable firewalld
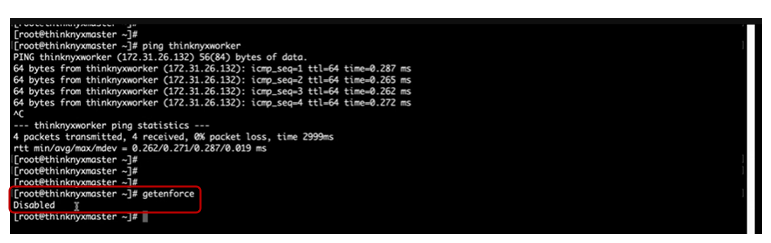
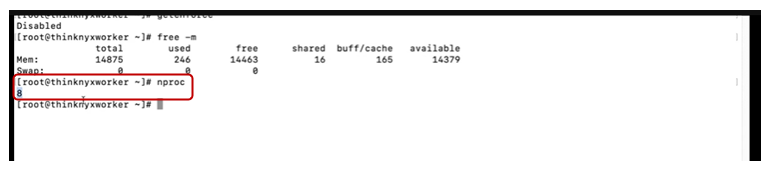
Likewise, the Selinux should be disabled. By running the below command, we can see it is already disabled.
# getenforce
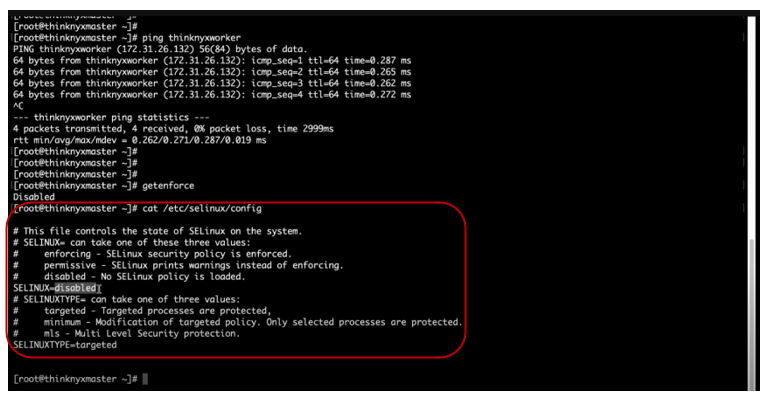
If it is not disabled, what we need to do is # setenforce 0, this will disable it for the current session. Once that is done, we need to edit the file /etc/selinux/config and write disabled in front of SELINUX. Then, reboot the system.
Always remember, the disabled state of SELinux will not be reflected until we reboot the system. Initially, it may show a permissive state, and when we attempt to install Symcloud Platform, it might indicate that SELinux is not disabled. Therefore, rebooting plays a vital role when changing our SELinux ecosystem.
The same steps we must perform in the worker node and ensure that the SElinux is disabled.
Next, we have to ensure there is no Swap in both servers.
When dealing with cloud services, the provision of swap incurs additional costs. In contrast, on-premises setups inherently include swap. Ensure it is disabled.
It’s important to emphasize that disabling Swap is not a specific prerequisite of the Symcloud Platform but a requirement of Kubernetes. Without disabling Swap, the kubelet in Kubernetes may encounter issues and fail to function properly.
Now, let’s check the CPU core by running # nproc command. As we see, it’s 8 cores as required.
We need to verify the same in the master node as well.
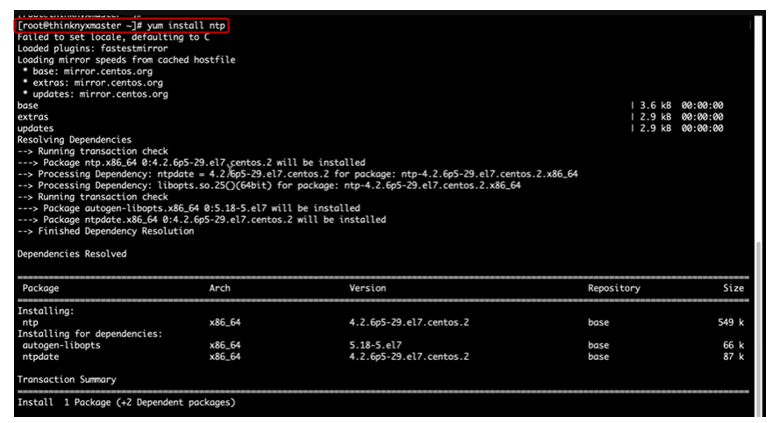
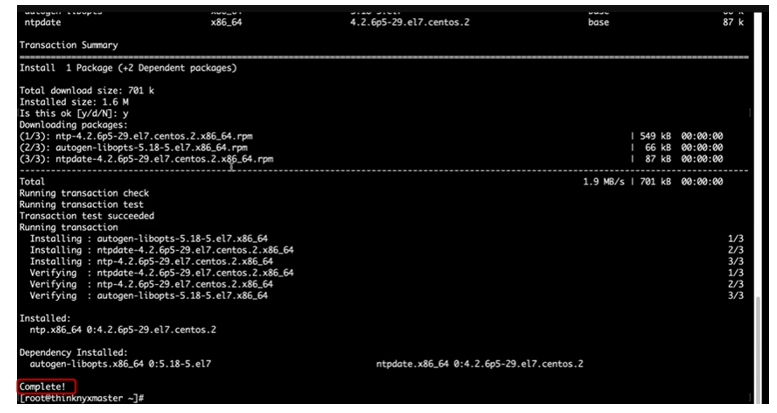
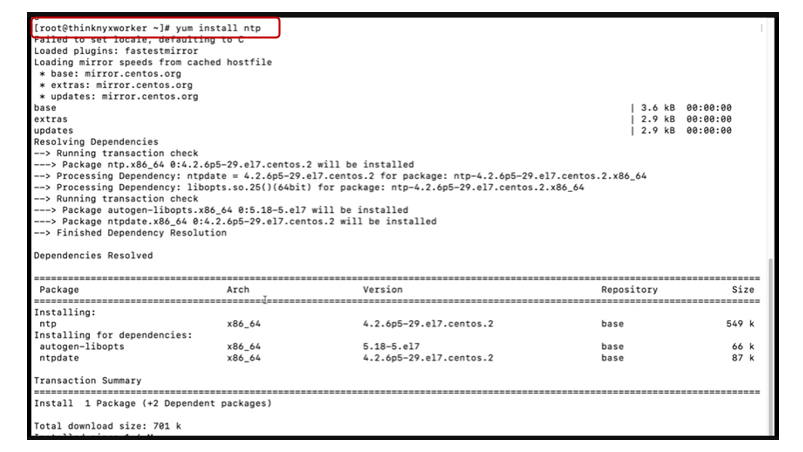
Now, let’s install the Network Time Protocol (NTP) by running # yum install ntp command.
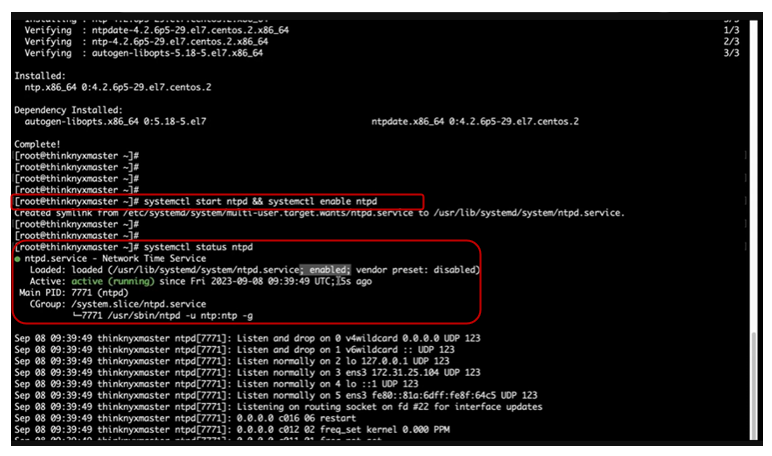
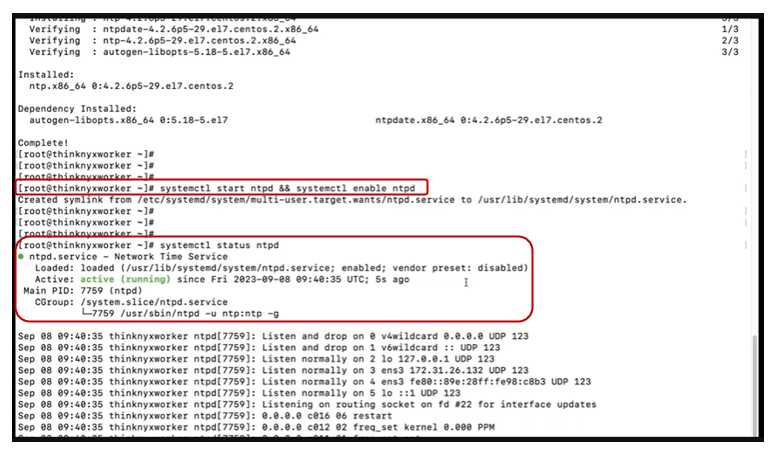
Once it is installed, we can enable and check the status by running the below commands.
# systemctl start ntpd && systemctl enable ntpd
# systemctl status ntpd
Install and enable the same in the worker node as well.
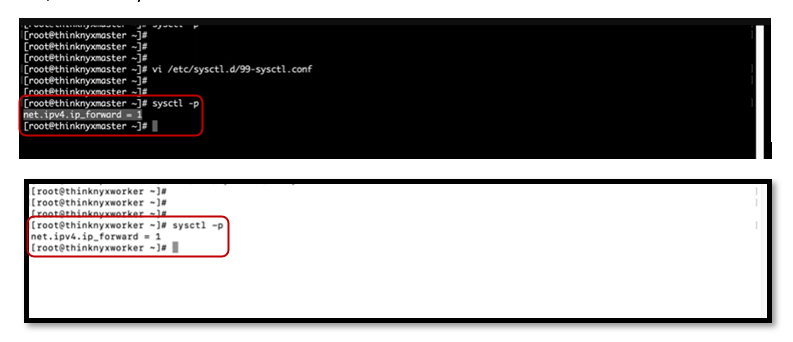
Let’s check the IP forwarding now by running #sysctl -p command in both servers. As we can see, it’s already enabled.
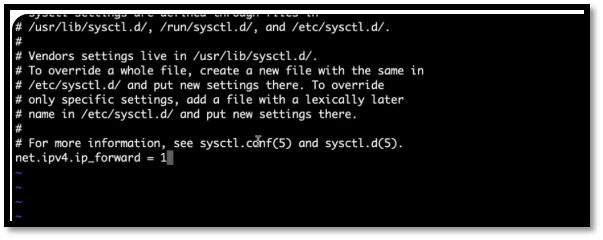
Note: If it is not enabled, we must edit the file (/etc/sysctl.d/99-sysctl.conf) and add net.ipv4.ip_forward = 1 as shown below.
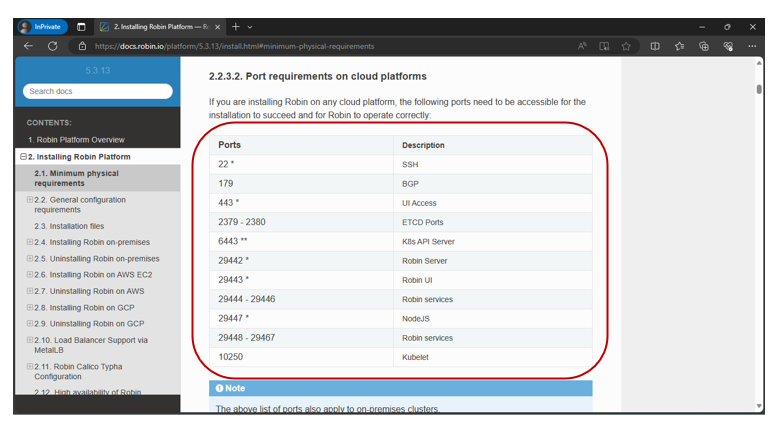
Next, please ensure to open the necessary ports for Robin’s services as mentioned in the documentation (docs.robin.io).
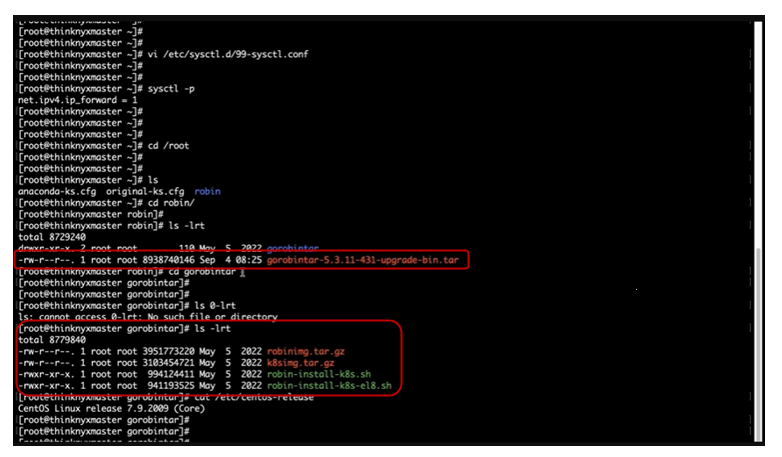
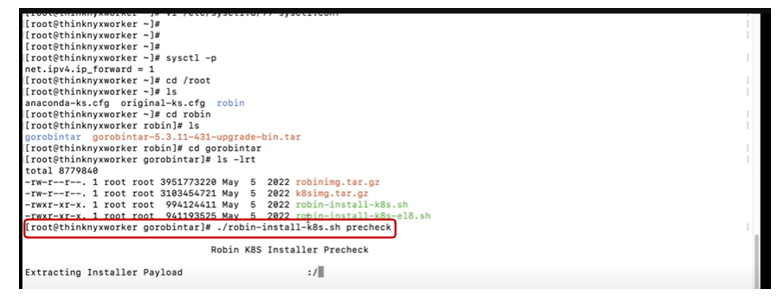
As mentioned in the earlier section, we have already received the Symcloud Binaries from the Robin Support team and stored them on the server. Now, let’s check the components available in the binaries.
We extracted the binary and as we can see, it contains Robin images, K8s images, and the installation utility.
We are using CentOS-7 here and hence we will use robin-install-k8s.sh utility. In case we are using Enterprise Linux 8 (CentOS-8, RHEL-8, etc.) we would need to use robin-install-k8s-el8.sh.
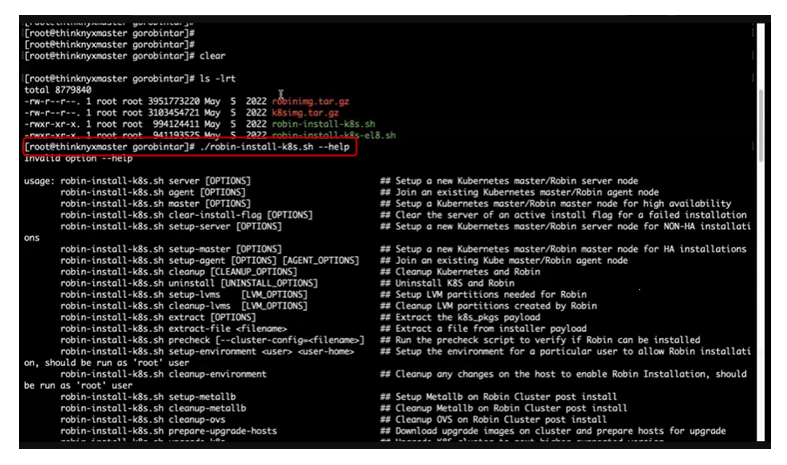
In the command line, we can check all the available options by running the below command,
# ./robin-install-k8s.sh – -help
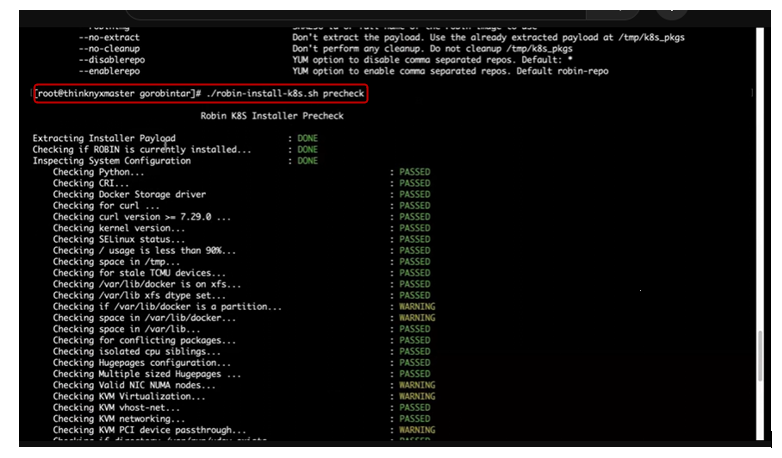
In order to do the pre-checks, let’s execute the below command on both the servers:
# ./robin-install-k8s.sh precheck
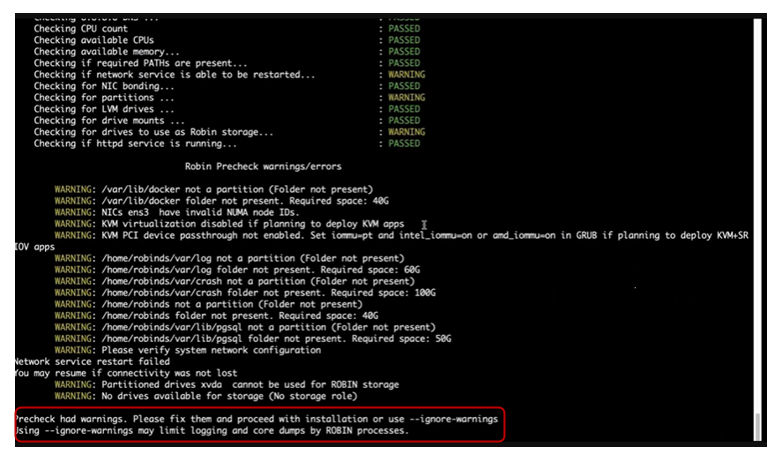
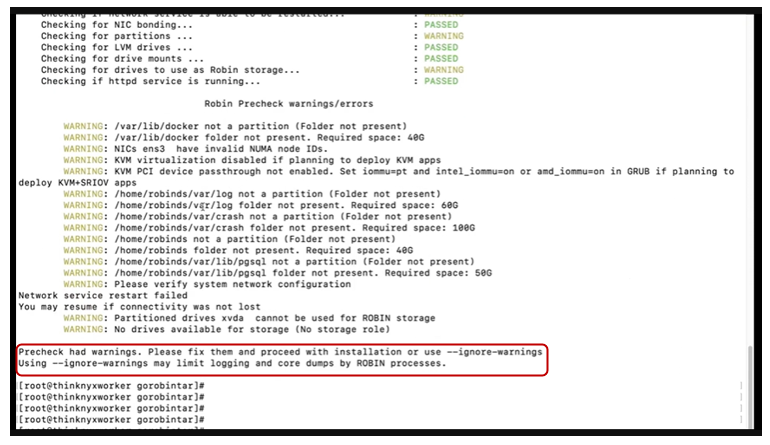
The prechecks have been passed with few warnings. It’s recommended to fix these before moving further. Or, we may use – -ignore-warnings option to ignore those but it may limit some of the functionalities.
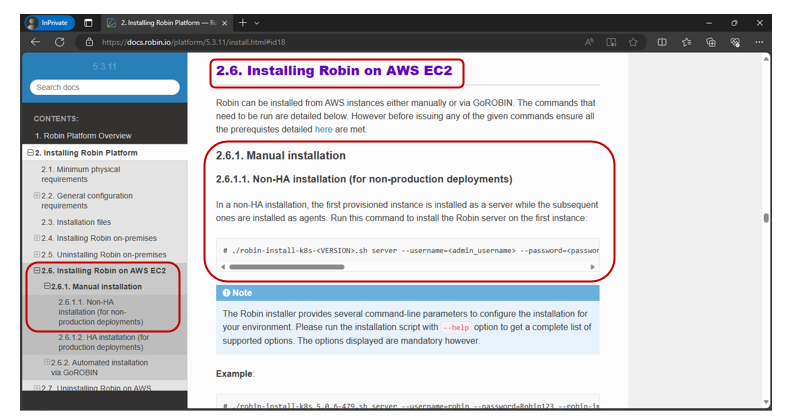
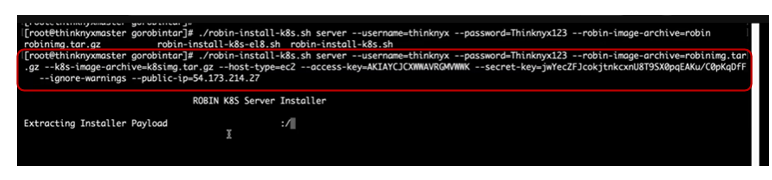
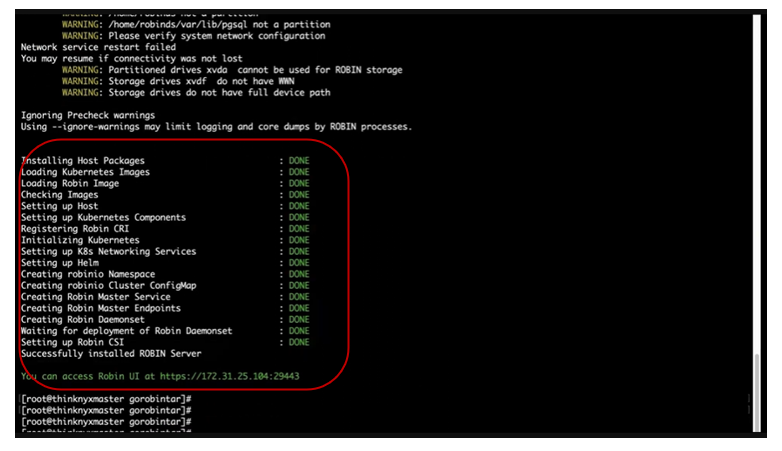
Now, let’s start the master server installation by running the below command,
Note: Please ensure to add the public IP argument while executing the command (as shown above). This public IP here refers to the public IP of this master server.
We can also refer to the official documentation available at docs.robin.io for detailed information.
As we can see below, the installation has been started. This will do the precheck first and then proceed with the installation.
The installation has now completed.
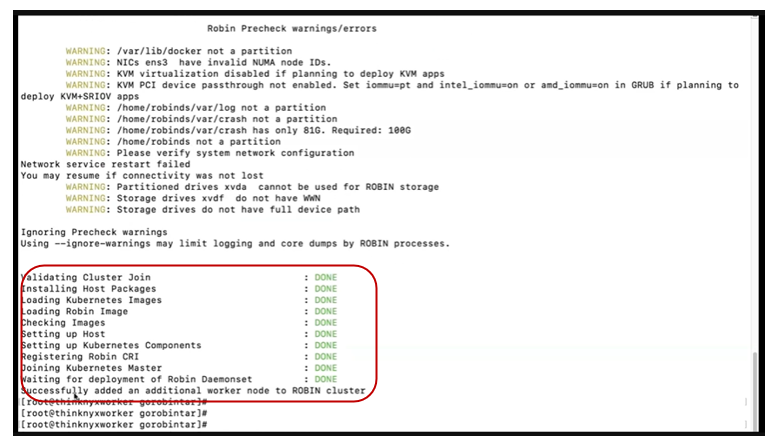
The next step is now to install the Robin agent in the agent nodes by executing the below command,
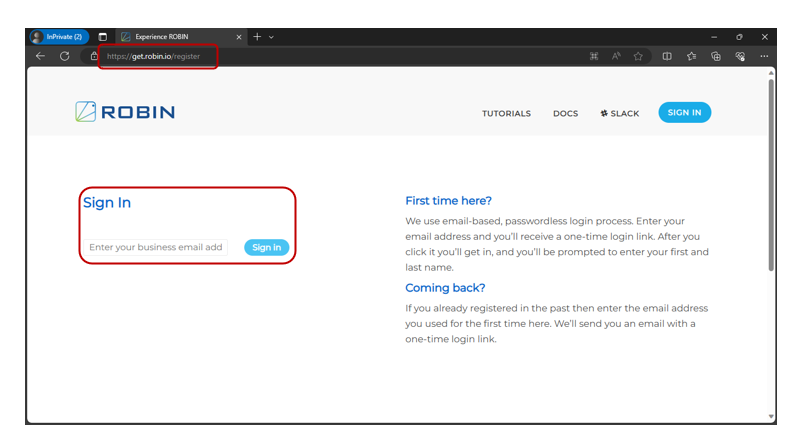
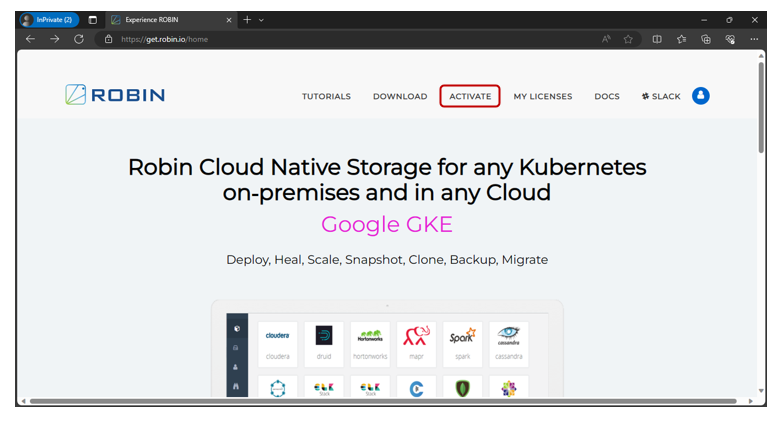
Once we put our email-id and click on Sign-in, we receive an email from [email protected] with a login link. Click on that login link.
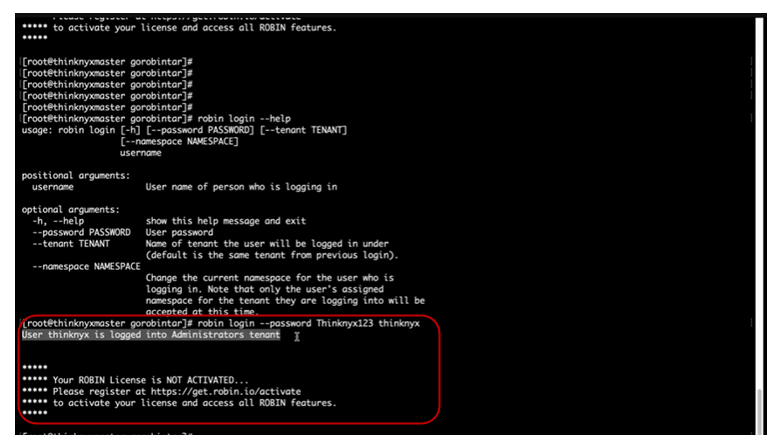
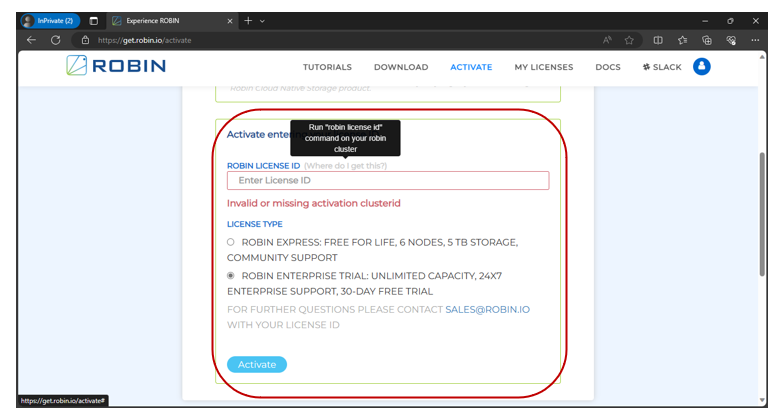
After login, click on Activate.
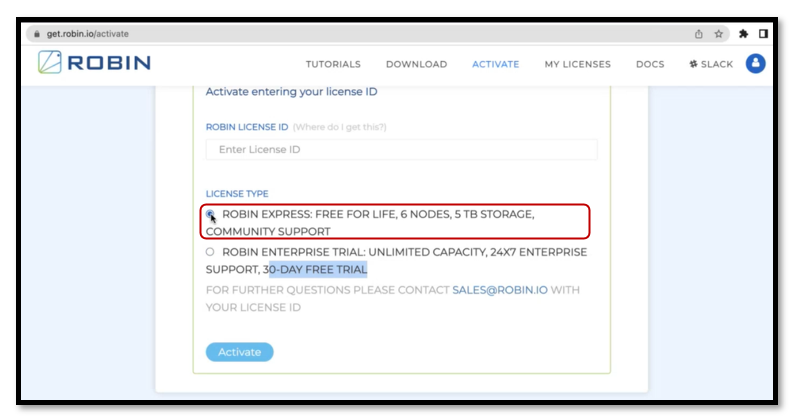
There are two types of licenses, one is Robin Express which is a lifetime free license, and the other is Robin Enterprise Trial which is free for 30 days. Here we will use the Robin Express license.
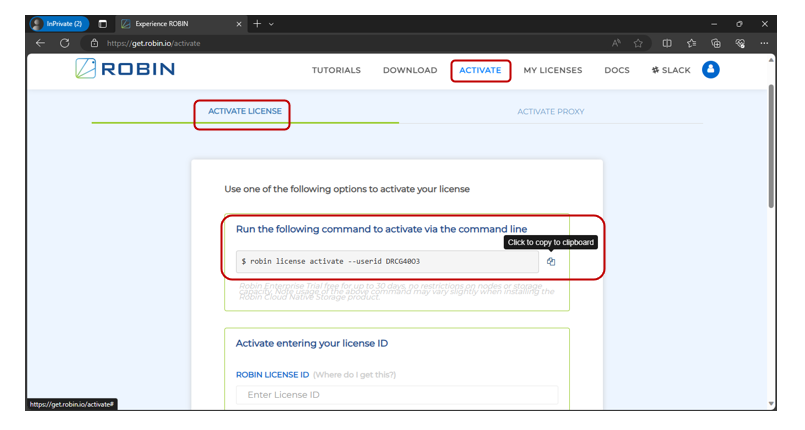
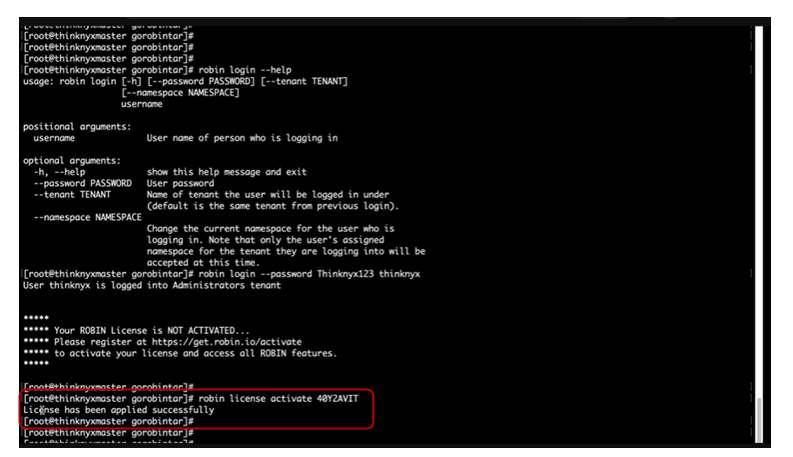
Copy the activation command and run in the command line to activate the license.
The license has been activated now.
We can also activate the license from the website by using our License ID.
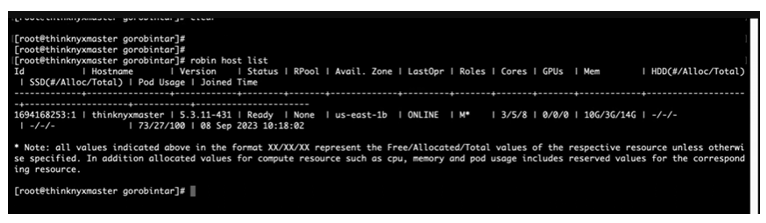
After activating the license, let’s run # robin host list command to check the details like Hostname, Version, Status, etc. of the server.
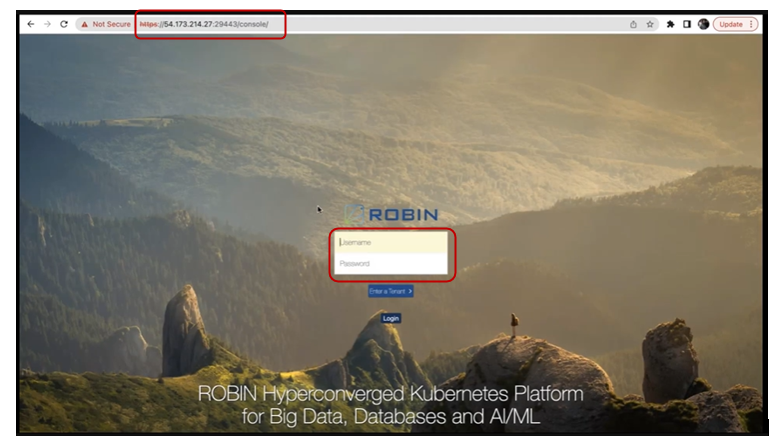
Now, take the public IP of the server, open it in the browser with port 29443, and pass the username & password that we configured earlier to access the Dashboard.
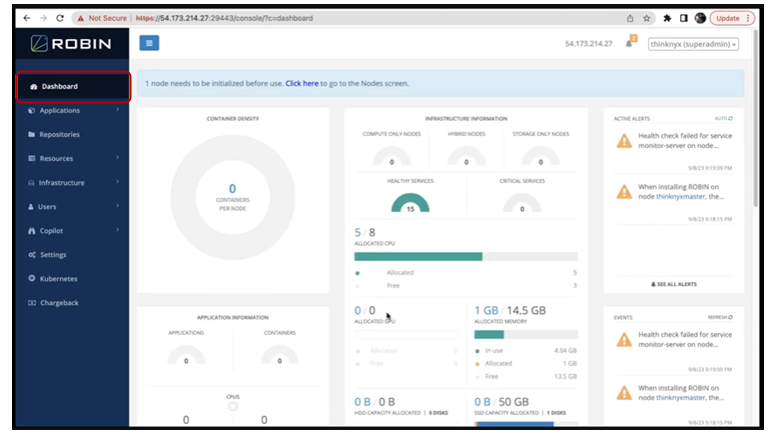
Now, before we conclude this blog/guide, let’s quickly understand the key components of Symcloud Platform Dashboard.
Dashboard: This section will give us the entire high-level information of our cluster, like how many nodes are there, which roles they belong to, what are the active alerts and events, what compute and resources are available, application details, etc. Once we enable the metrics, it will also show the metrics details. Moreover, it provides us with the opportunity to access its Grafana Dashboard.
Applications: This is the place where we are going to see our installed applications. At present, it will show us only those applications which have been deployed using the Robin bundle.
Repositories: This option allows us to keep the backup of our application outside of our cluster and restore it from there in case of any disaster. The supported remote storage options are AWS S3, Google Cloud Storage, and Azure Blob (supported in the latest version of Symcloud Platform).
Resources: Here we can find two options, Namespaces and PDVs. Namespaces are the Robin-managed namespaces and PDVs are Persistent Data Volumes. PDVs are a kind of shared file system or shared NAS disk that acts like a home directory of the user that we are creating using Robin.
Infrastructure: It will give us the details about Node, Storage, Resource Pools, and Network.
Users: It will give us the details about local users. We can create a user, allocate it to a tenant, then assign a role to it and give permissions to them. The available roles are Super Admin, Tenant Admin, and User.
Copilot: Here we can see alerts, events, jobs, and user audits.
Settings: This is the place where we are going to see things like registries, file collection, metrics, and license information.
Chargeback: Here we can find the incurred charges based on GPUs, CPUs, Storage, Memory, etc. for every application we have deployed.
Conclusion:
Our journey in this blog now comes to an end. Along the way, we’ve taken a comprehensive look at the Symcloud Platform, covering everything from its overview to supported platforms, prerequisites, a detailed step-by-step installation guide, and finally, accessing the Symcloud Platform Dashboard while grasping the essential components.
We believe that this wealth of information empowers to actively participate in real-world scenarios and acquire practical experience with the Symcloud Platform.