Symcloud Storage is an enterprise-grade advanced storage and data management solution, that was previously known as Robin Cloud Native Storage (or Robin CNS). It can be deployed as a Standard Kubernetes Operator and manage Stateful Workloads with ease.
In this blog/guide, the below topics will be covered:
Symcloud Storage Components
Installation Prerequisites
Install Options
Pre-install Checks
Installation of Symcloud Storage on Native Kubernetes
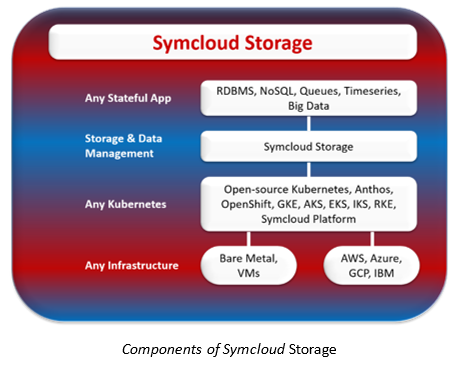
Symcloud Storage Components
Symcloud Storage seamlessly operates on-premises, utilizing your existing disks and arrays, while also offering full integration with any of your preferred cloud providers such as GCP, AWS, Azure, and IBM, delivering hybrid cloud capabilities.
It is compatible with any Kubernetes distributions like IBM Cloud Kubernetes Services, Anthos, RedHat OpenShift, AKS, EKS, and many more.
Users of these distributions can seamlessly integrate Symcloud Storage, leveraging advanced data management features within its cloud-native software-defined storage solution.
It supports stateful applications, including various database systems such as NoSQL, RDBMS, Timeseries, and Big Data.
Installation Prerequisites
The following outlines the prerequisites for the installation of Symcloud:
Note: For detailed pre-requisites, kindly refer to docs.robin.io .
Install Options
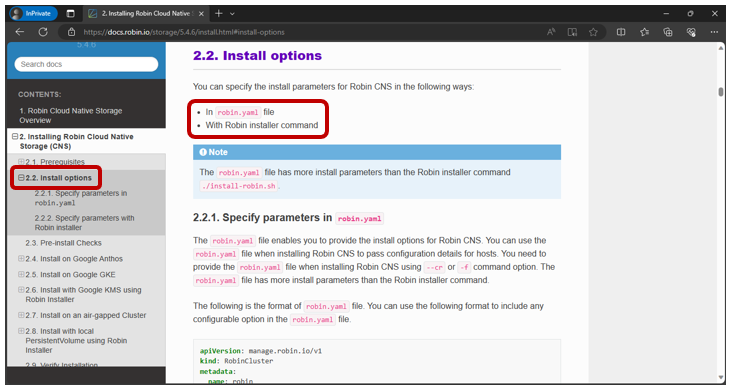
When we talk about the installation options, Symcloud Storage provides two methods for deploying Symcloud Storage:
By using robin.yaml file
By using Robin Installer command
In this blog, we will be using the Robin Installer to set up Symcloud Storage from scratch.
Pre-install Checks
Once all prerequisites (as mentioned above) are in place and the install option is selected, a quick pre-installation check needs to be performed by using the below command:
./install-robin.sh –execute-prechecks
Note: You can get the installer files from get.robin.io or by contacting the Robin Support team.
Installation of Symcloud Storage on Native Kubernetes
Before we get started, we will explore the official documentation.
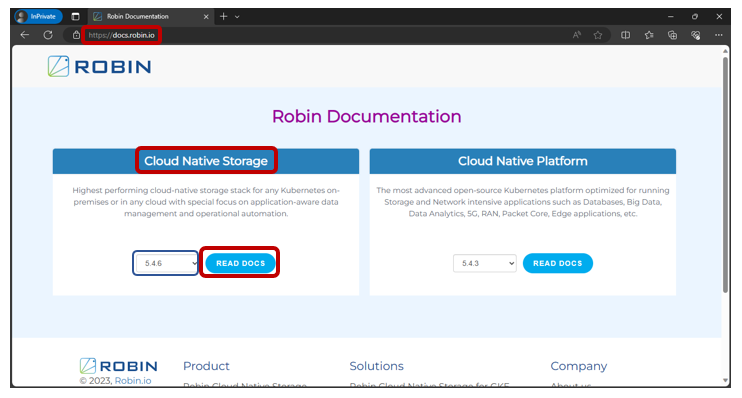
Go to docs.robin.io, select the version of your choice, and click on Read Docs under Cloud Native Storage section.
The latest version of Symcloud Storage at the time of writing this blog, is 5.4.6.
Let’s now explore the documentation for it.
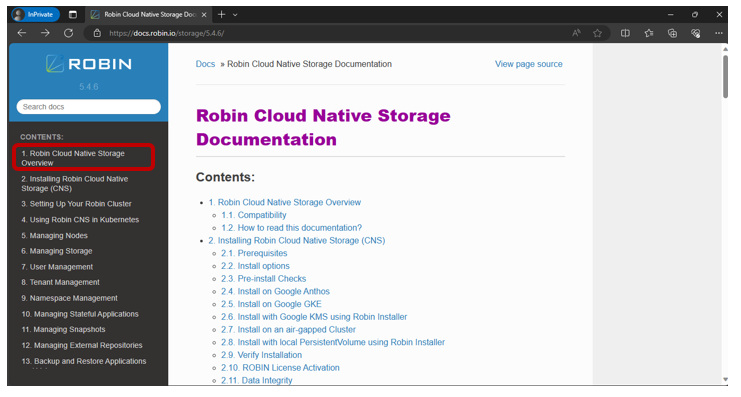
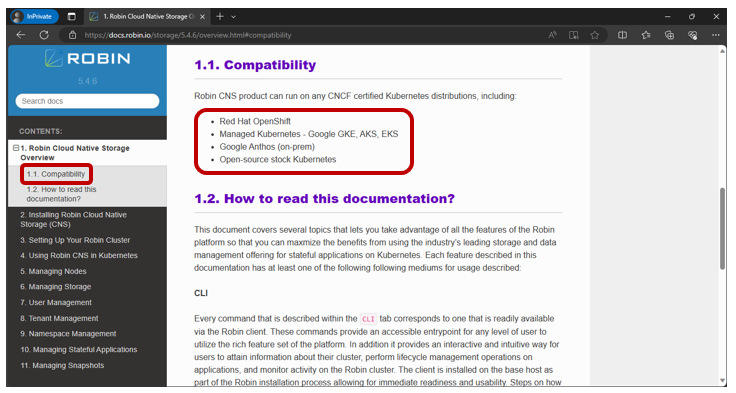
Click on Robin Cloud Native Storage Overview which will provide a high-level understanding of the industry’s leading Storage and Data Management solution for Kubernetes.
As we can see, Symcloud Storage or CNS is compatible with RedHat OpenShift, Managed K8s like GKE, AKS and EKS, Google Anthos and with Native K8s.
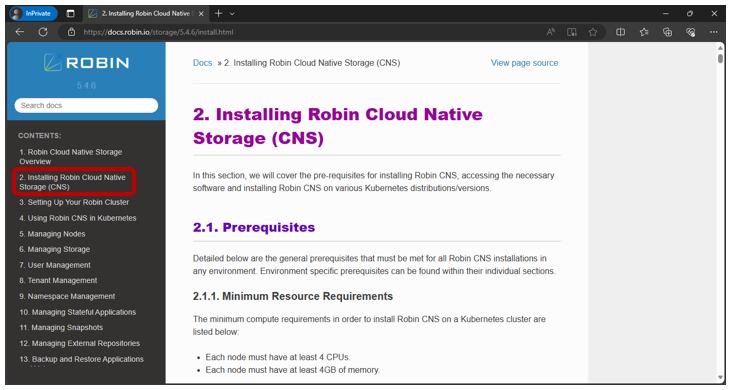
To check the prerequisites and installation options, click on Installing Robin Cloud Native Storage (CNS).
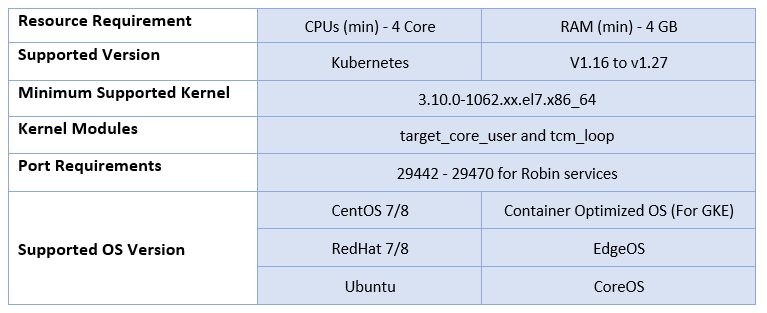
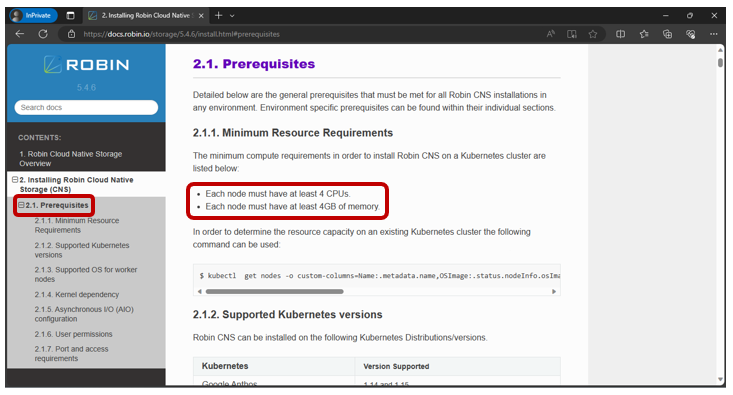
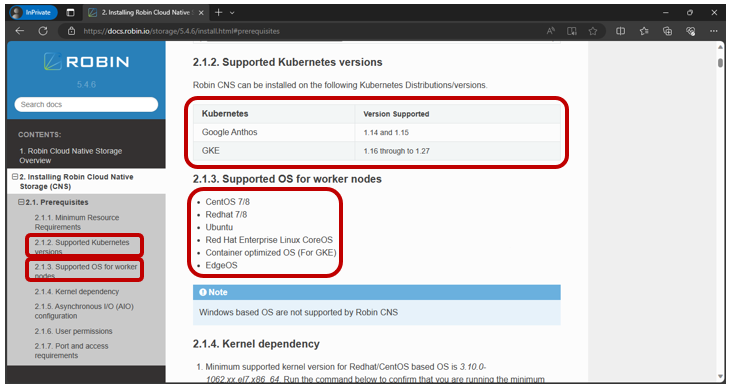
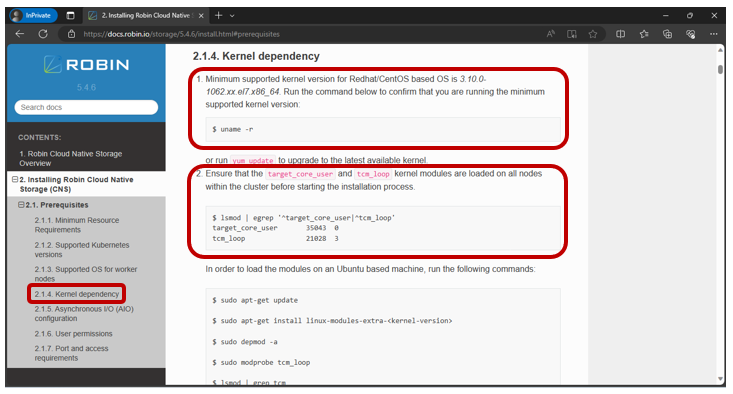
Under the Prerequisites section, you will find information on resource requirements which is minimum of 4 core CPUs and 4GB memory per node, supported K8s versions, supported operating systems, minimum kernel version and required kernel modules which are target_core_user and tcm_loop.
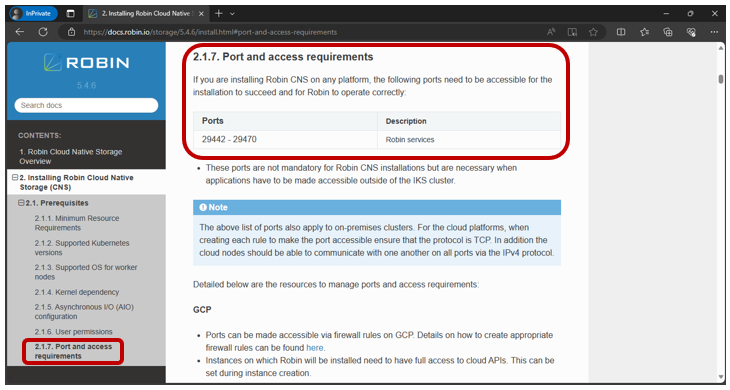
If you further scroll down, you will find the port requirements ranging from 29442 to 29470 for robin services. There are a few more requirements if you are considering CNS for your production ecosystem.
As mentioned earlier, CNS can be installed in two different ways,
By using robin.yaml file
By using Robin Installer command (i.e., ./install-robin.sh)
Now that we are familiar with the prerequisites, let us proceed with the setup.
In our case, we will be setting up CNS on Native K8s and hence we would be having:
K8s Cluster in place
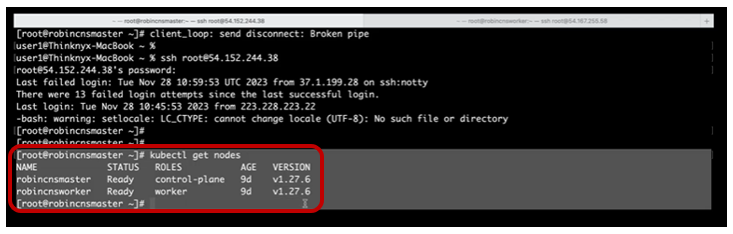
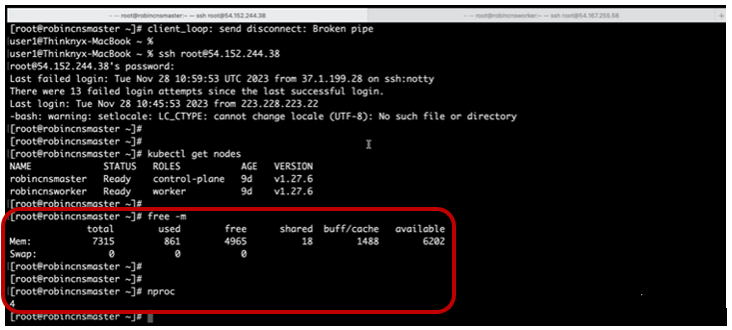
In our case, we have two node K8s cluster which is up and running, and the nodes are in ready state.
Now, we should have, CNS binaries with us.
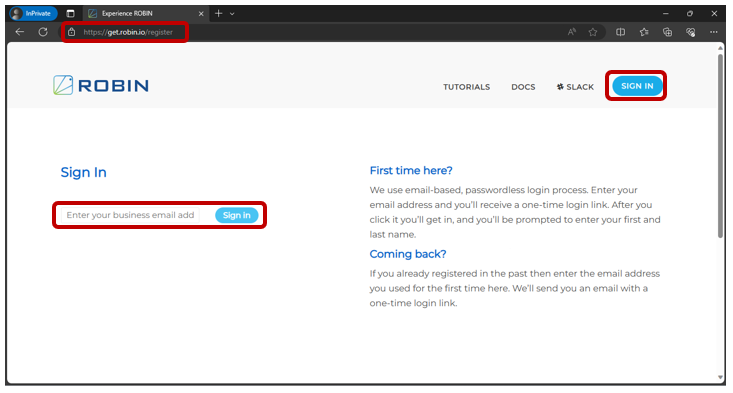
To obtain CNS binaries, go to get.robin.io, click on Sign In, provide your email address.
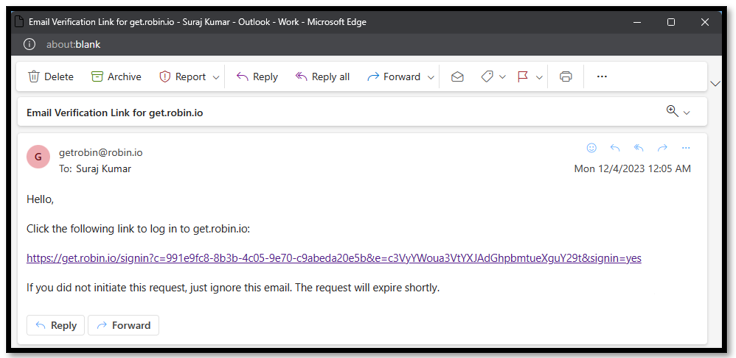
Then, you will receive a link in your email like this,
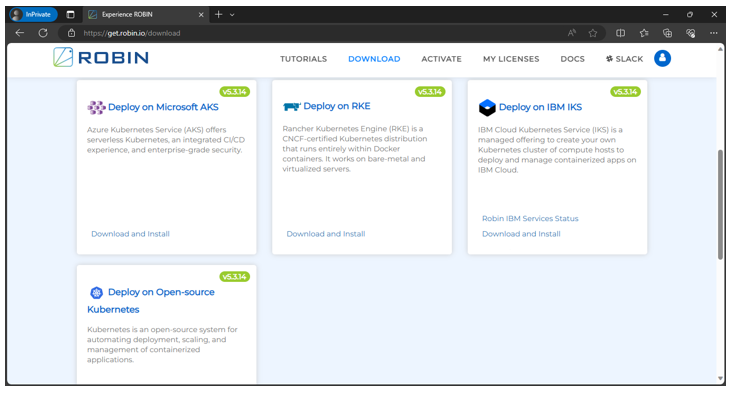
Paste this link on your browser and you will see all the details on this page. Now, click on Download and select the software for your preferred k8s platform.
In case you find the old version of the CNS software here, you may contact Symcloud Storage or Robin support team to get the latest version. In our case here, we have received the binaries from their support team.
Let us now verify the pre-requisites of our cluster.
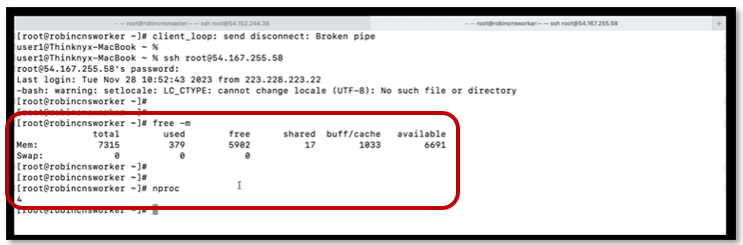
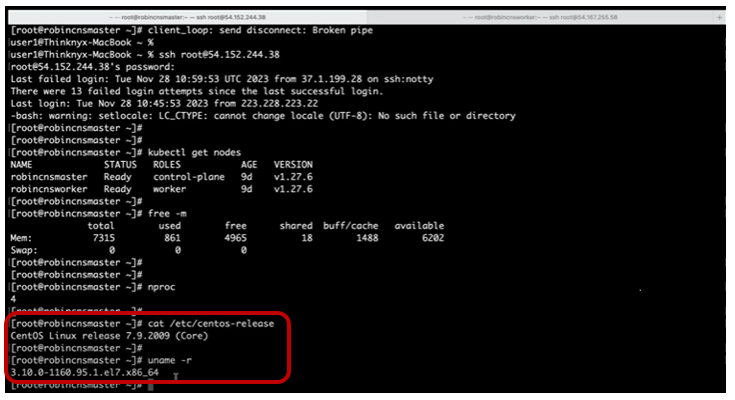
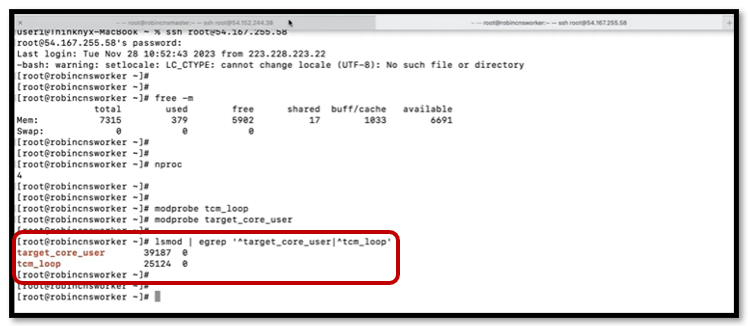
We have 8GB RAM and 4 core CPUs on our master node, even the worker is also of the same configuration.
The Operating System is the supported one, which is centos:7, and kernel version is greater than the supported one as mentioned in the documentation.
cat /etc/centos-release
uname -r
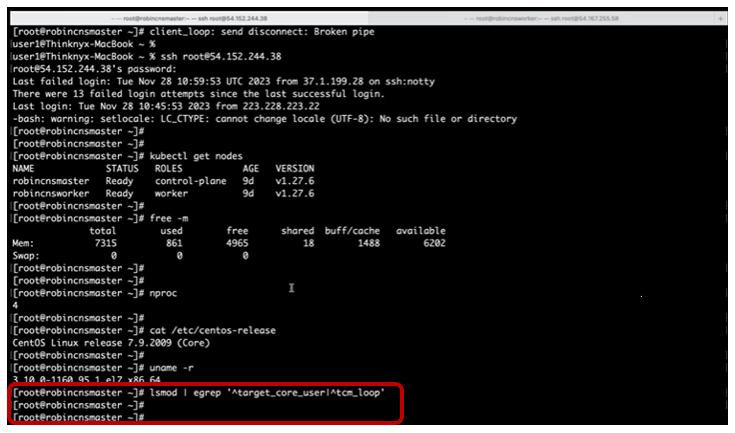
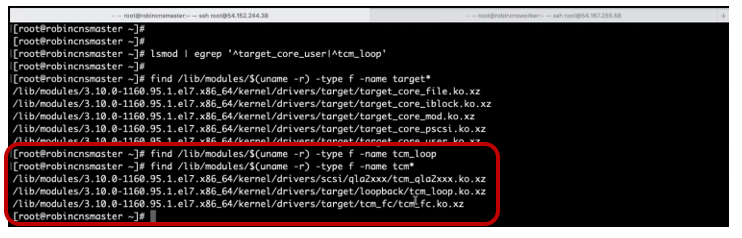
Next, we need to ensure the required kernel modules are loaded, so copy and paste the lsmod command from the documentation to check the module status. Both target_core_user and tcm_loop kernel modules are absent.
lsmod | egrep ‘^target_core_user|^tcm_loop’
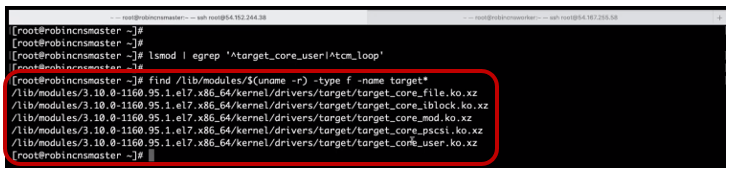
Let us now find these modules by running the below command,
find /lib/modules/$(uname -r) -type f -name target*
As we can see, we have target_core_user module here,
Similarly, we will find tcm_loop by running the below command,
find /lib/modules/$(uname -r) -type f -name tcm*
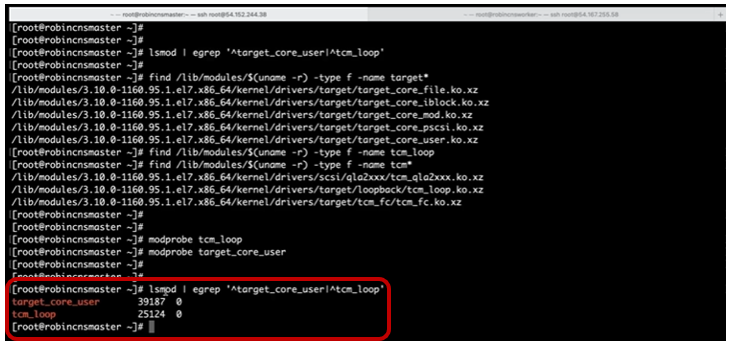
Let us now load both of these modules using modprobe command,
modprobe tcm_loop
modprobe target_core_user
Here, we can see that both target_core_user and tcm_loop modules are loaded.
We have to load both of these modules in the worker node also.
Before moving further, we need to ensure that all the required ports (for robin services) are opened for the VMs.
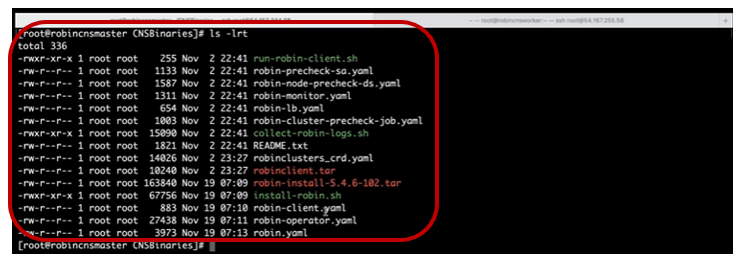
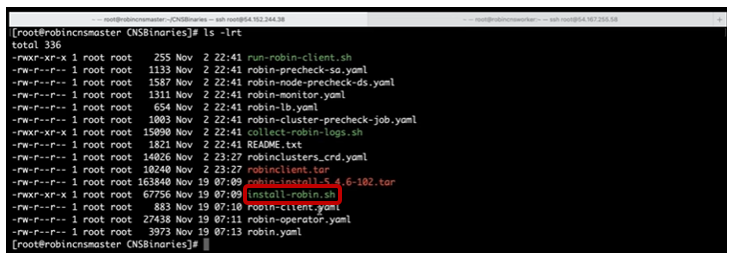
As we got the latest binary for CNS version 5.4.6 from Symcloud Storage team, let’s go inside CNSBinaries directory. We can see all the installer and several yaml files are available there.
We will be using robin installer utility install-robin.sh in order to pre-check our setup followed by actual installation.
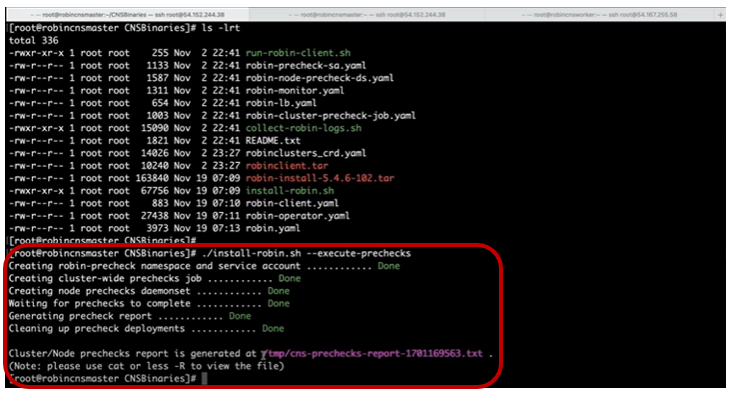
In order to do the pre-checks, lets execute the below command:
./install-robin.sh –execute-prechecks
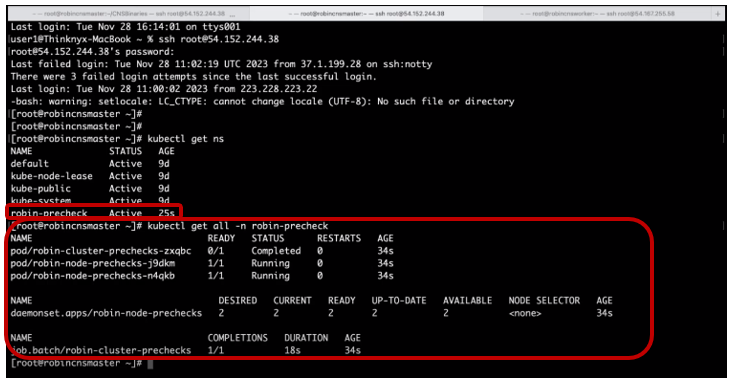
Now, we can see that the installer has created a namespace named “robin-precheck” and created few pods and jobs which will verify and check the pre-requisites.
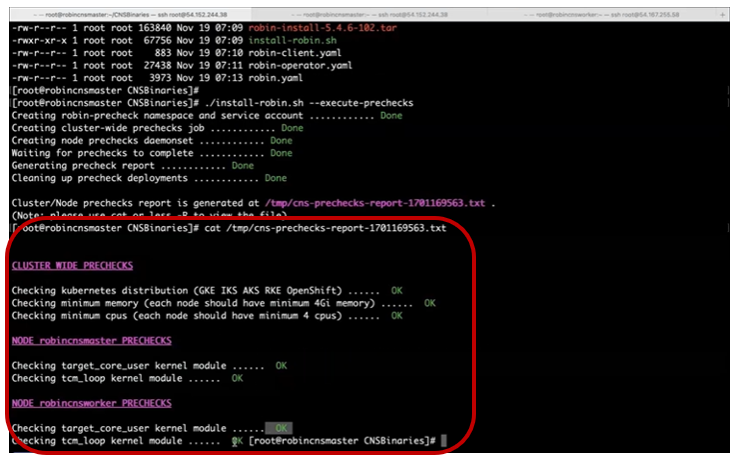
Once the pre-checks are completed, we can examine the check file which will provide us the details of the checks for every node. In our case everything looks fine on both master and worker node.
We are good to proceed with CNS installation now.
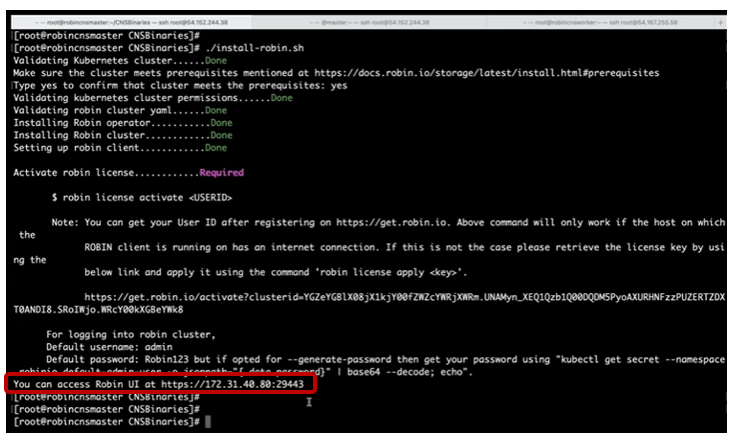
Let’s run ./install-robin.sh and confirm the pre-checks by typing “yes”.
This will start the installation by creating multiple resources including namespaces, deployments, daemonsets, jobs, secrets, configmaps, custom resources, storage classes etc. The entire process will take approximately 10-15 mins to get completed.
So, finally our installation is completed successfully.
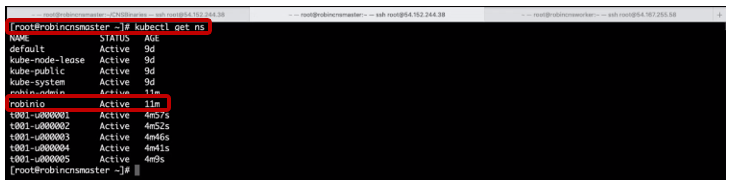
Let’s now observe the deployed resources by running kubectl get ns command.
We can see a namespace named “robinio” where most of the Symcloud Storage objects has been created.
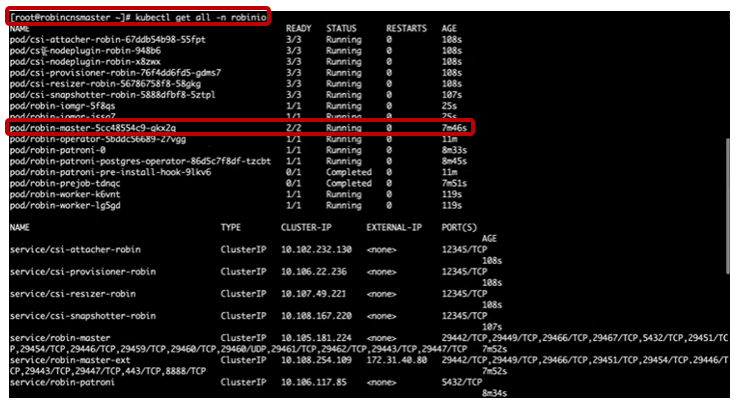
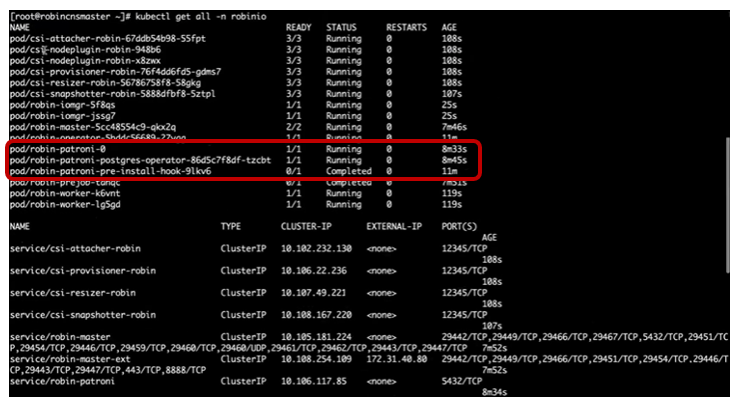
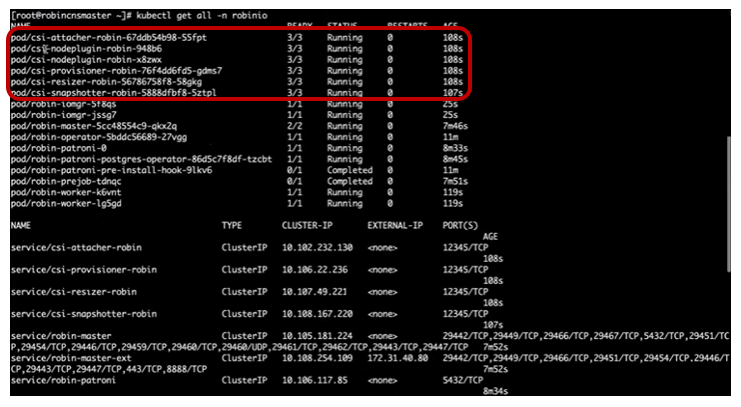
Let’s run kubectl get all -n robinio to see the major objects deployed by Symcloud Storage. We can see Robin Master Pod which is deployed as a Deployment.
The Robin Master Pod acts as a Manager. It runs the major master services like:
Consul server
Robin Server
Robin event server
Robin Authentication server
Sherlock
Node monitor
PGSQL
HTTP server
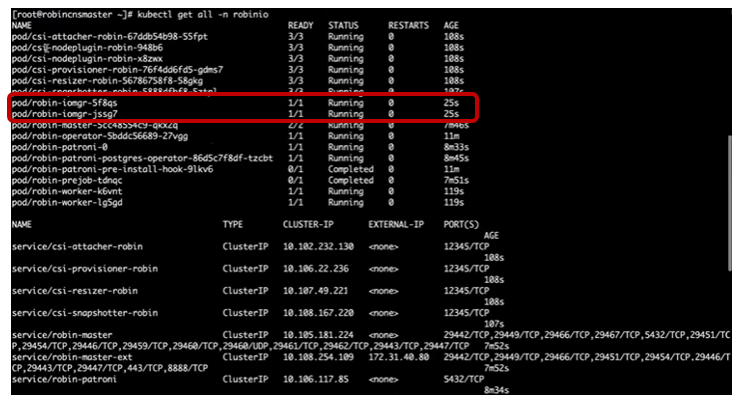
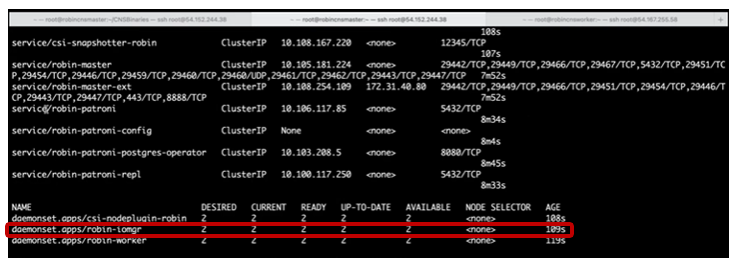
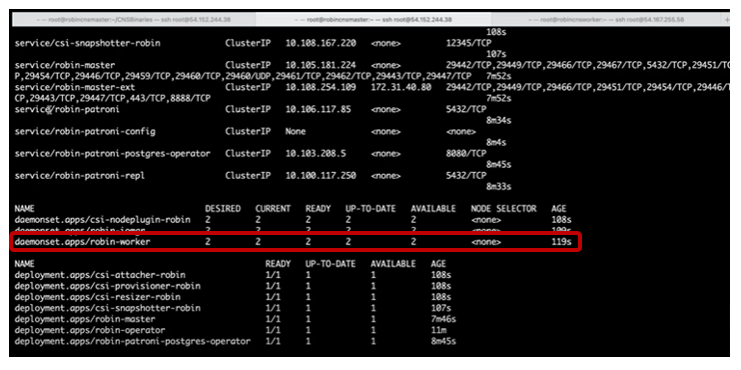
Robin IOMGR Pods are deployed as a DaemonSet and are responsible for handling I/O requests from the application.
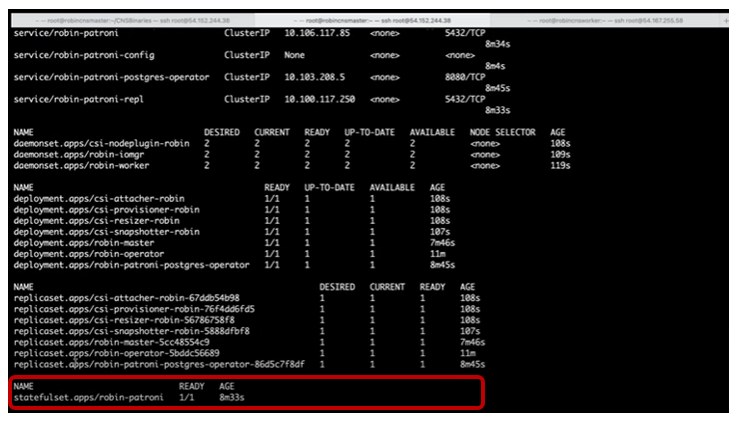
In the latest CNS releases, Patroni has been introduced as an independent PostgreSQL cluster and it is deployed as part of Robin CNS installation as a statefulset.
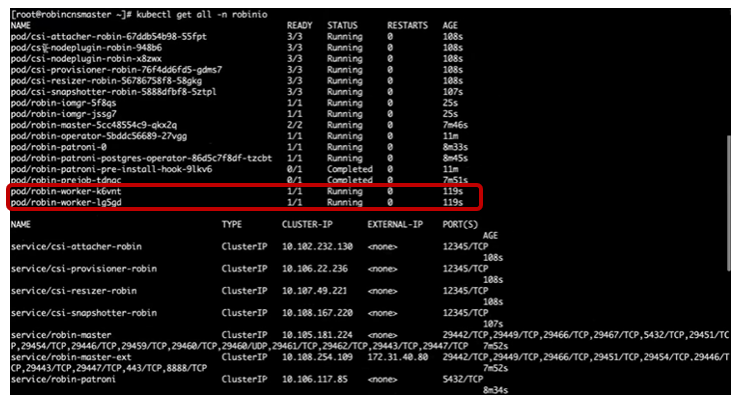
Robin worker Pods are deployed as a DaemonSet to run the agent services, such as monitor.
Few more pods are also created for the purpose of storage attachment, provisioning, resizing, snapshots etc.
Finally, our installation is completed.
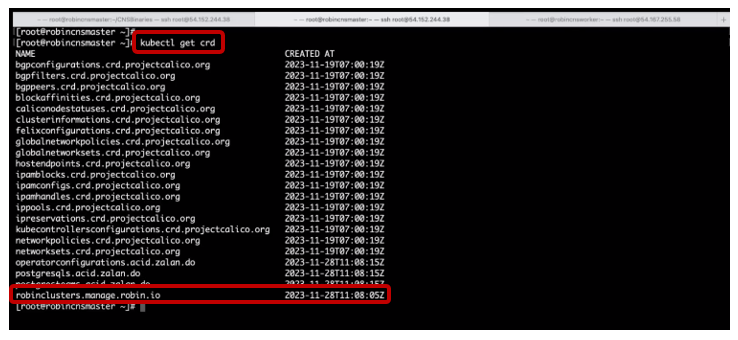
Let’s verify the same by checking robinclusters CRD. We can see a CRD with a name “robinclusters.manage.robin.io”.
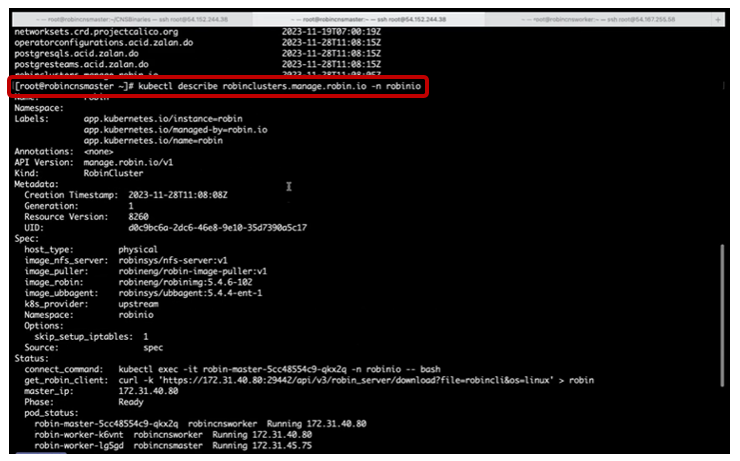
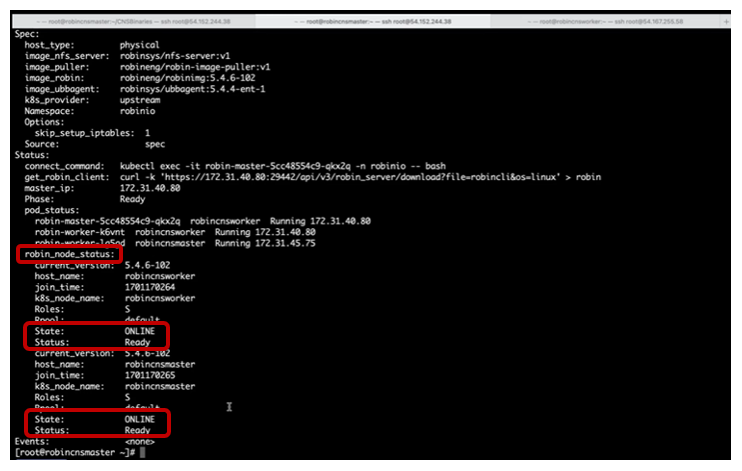
Let’s describe this CRD using kubectl describe command and You will observe a status indicating ‘Online’ and ‘Ready’ for nodes. In our case, we have two nodes and both are in ‘Online’ and ‘Ready’ status.
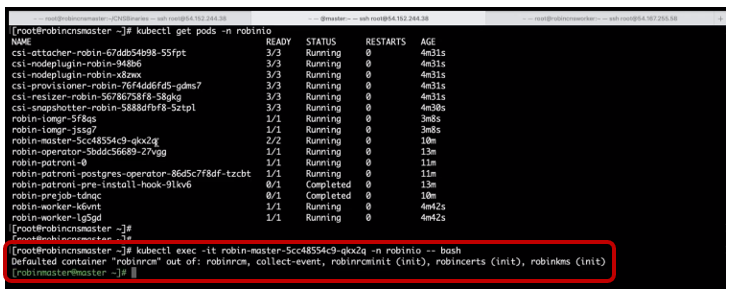
Let’s login into the robin master pod by executing the below command,
kubectl exec -it MASTER-PODNAME -n robinio – bash
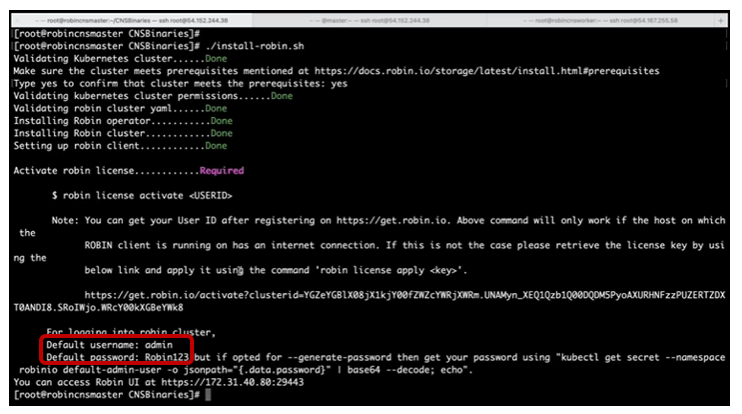
From here, we can login into the robin cluster to verify the cluster status. You can check the default username and password which is admin and Robin123 in our case.
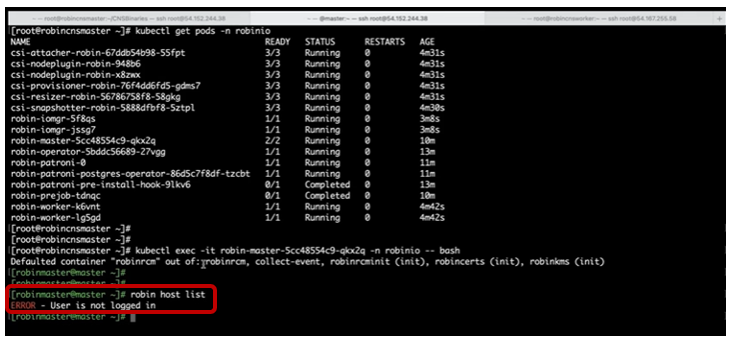
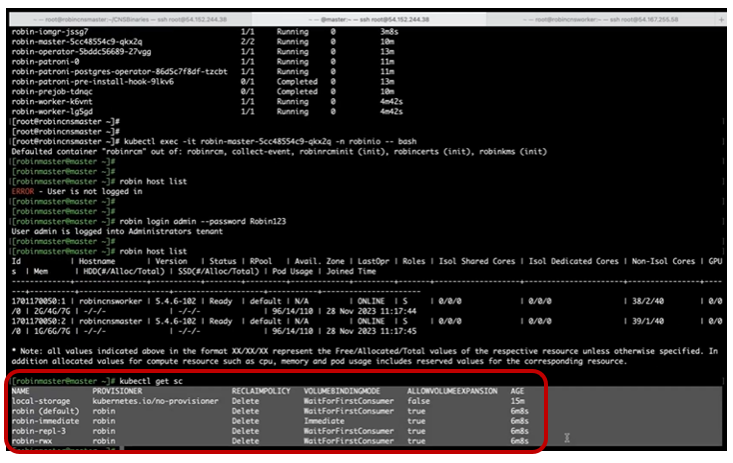
Running robin host list will show user is not logged in.
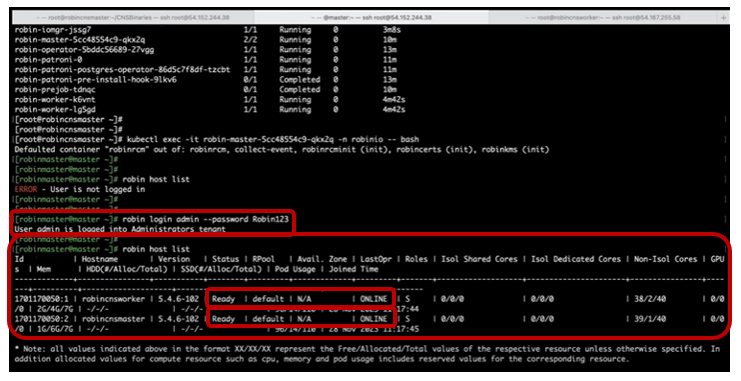
Let’s login by running robin login admin –password Robin123 and verify the robin cluster status using robin host list. Both of our nodes are showing ready and online.
By running kubectl get sc we can verify the default storage classes which gets deployed by CNS.
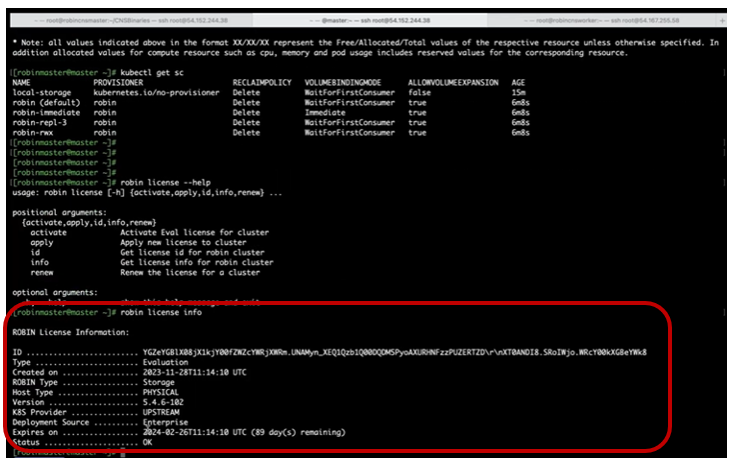
You need not to activate anything. Run robin license info command which will show you the Evaluation license which is active for 89 days.
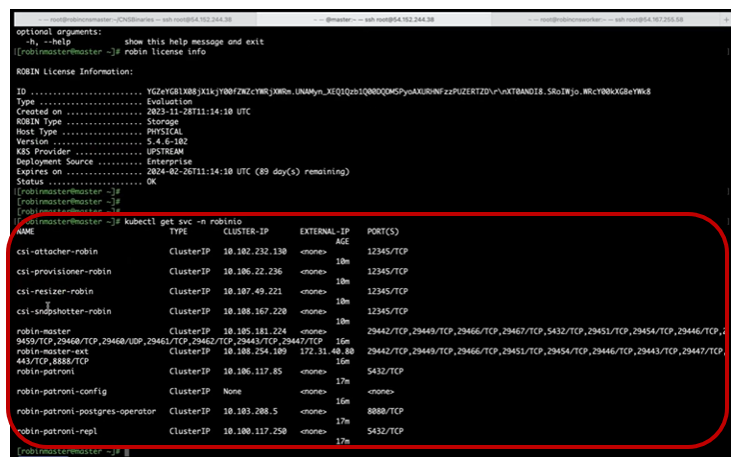
You can access Robin UI on port 29443.
Everything is internal as we can see CLUSTERIP with all services.
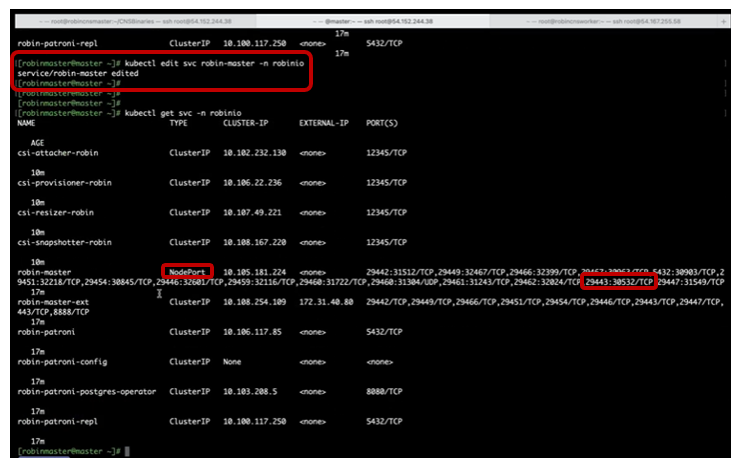
In order to access CNS dashboard, we need to change robin-master services from ClusterIP to NodePort or Loadbalancer.
Let us change it to NodePort by running kubectl edit command and changing the ClusterIP to NodePort. You can see the Service TYPE is NodePort now and port 29443 is mapped with 30532.
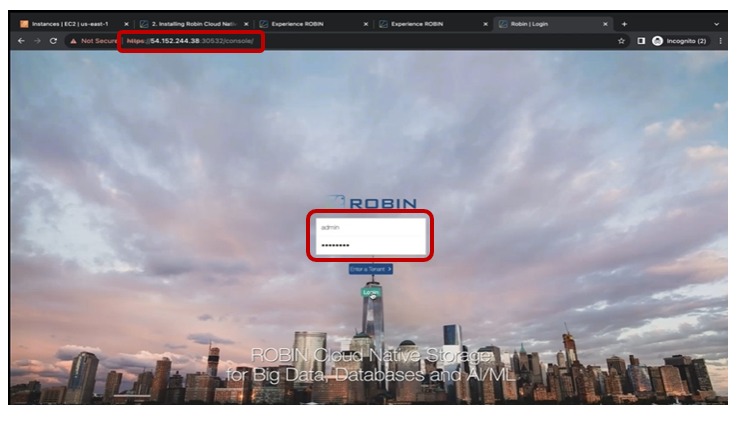
Let’s try to access the dashboard on port 30532.
Check the Public IP for your node and paste it in the browser with Port 30532. Enter the username and password to access Robin UI.
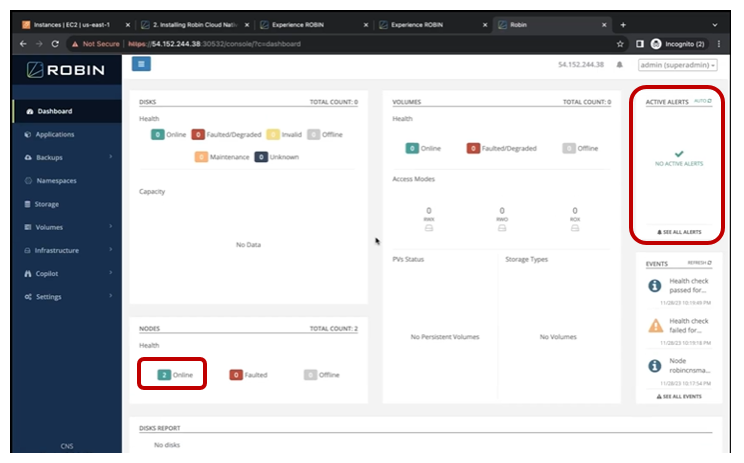
You can see there are no active alerts and under nodes section there are 2 online nodes.
Conclusion
As we conclude this blog/guide, we have understood the Symcloud Storage landscape, exploring its overview, essential prerequisites, a step-by-step installation approach, commonly used commands, and at the end, accessed the Symcloud Storage UI.
We trust that this comprehensive blog/guide equips you with the knowledge to engage in practical scenarios and enhance your proficiency with Symcloud Storage Software.
Symcloud Storage | Installation On Native Kubernetes